You know that feeling of excitement when you unbox new LED strip lights, only to discover they’re too long for your space? Yeah, it’s a real downer and trust me, I totally get how annoying it can be.
But guess what? There is some good news! After diving deep into the world of lighting solutions, I found out these LED strips can actually be tailored down to your preferred size. So stay with me as we navigate the waves of this cutting technique together.
Can LED lights be cut? Yes, LED lights can be cut to fit different spaces. To do this, measure the desired length, locate the designated cutting mark on the strip, use sharp scissors or a cutting tool to make a clean cut, and secure the cut end with connectors, soldering, or electrical tape. Remember to check the manufacturer’s specifications before cutting to ensure it’s safe to do so.
We’ll exchange handy tips and delve into necessary precautions to make sure those beautiful light strips maintain their shine even after being trimmed just right for your cozy nook!
Key Takeaways
- LED light strips can be cut to fit different areas and spaces.
- To properly cut LED light strips, measure the length needed, look for the designated cutting mark, and use scissors or a sharp cutting tool along the marked line.
- After cutting LED light strips, fix the cut end with connectors or soldering and secure the strip in your desired location using adhesive tape or mounting brackets.
- It is important to check the manufacturer’s specifications before attempting to cut an LED light strip as some are non-cuttable and trying to cut them may damage or malfunction the strip.

How to Cut LED Light Strips Properly

To properly cut LED light strips, start by measuring the length needed for your specific application. Then, look for the designated cutting mark on the strip. Using scissors or a sharp cutting tool, carefully cut along the marked line to achieve your desired length.
Measure the length needed

First, I find out how long the LED strip needs to be. This is done by measuring the area where I plan to put it. This might be a wall, desk or even under a cabinet. It’s important not to guess this length.
Use a tape measure for accuracy, and write down the number so you won’t forget it. Then decide on the exact size you want your light strip to be based on that number.
Look for the designated cutting mark

When cutting LED light strips, it’s important to look for the designated cutting mark. This is usually a small scissor or scissors icon on the strip itself. These marks indicate where it’s safe to cut without damaging the strip.
By following these marks, you can ensure that your LED light strips will continue to function properly after cutting them. It’s also important to note that different LED strip models may have different intervals between the designated cutting marks, so make sure to measure and cut accordingly.
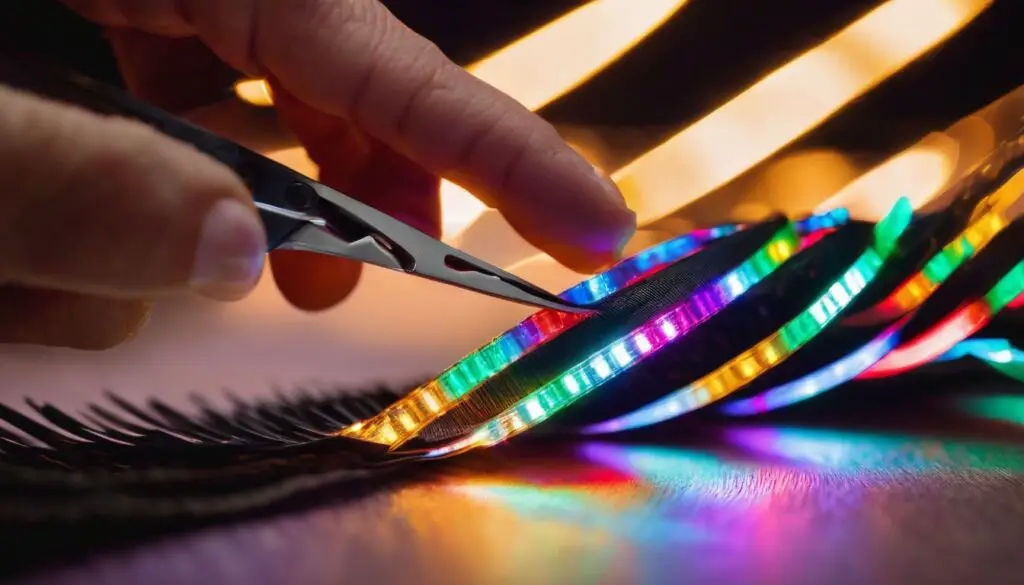
Use scissors or a sharp cutting tool

To cut LED light strips, you will need a pair of scissors or a sharp cutting tool. Make sure they are clean and in good condition before starting. Use the scissors or cutting tool to carefully cut through the strip along the designated cutting mark.
Take your time and make sure to apply enough pressure to create a clean cut without damaging the rest of the strip. Remember, it is important to use caution when handling sharp objects.
What to Do After Cutting LED Light Strips

After cutting LED light strips, you need to fix the cut end using connectors or soldering and then secure the strip in your desired location.
Fixing the cut end with connectors or soldering

To ensure the cut end of the LED light strips is properly secured and functional, there are a few options to consider:
- Use connectors specifically designed for LED light strips. These connectors allow you to easily attach and secure the cut end without the need for soldering.
- Soldering is another option if you have the necessary skills and tools. It involves melting a metal alloy onto the cut end of the LED strip and attaching it to a new power source or connector.
- If using connectors or soldering is not feasible, you can also try using electrical tape to insulate and protect the exposed wires.
Securing the strip in the desired location

To secure the LED light strip in the desired location, I recommend using adhesive tape or mounting brackets. Adhesive tape is a simple and convenient option that allows you to stick the strip onto any clean surface.
Make sure to clean the surface beforehand for better adherence. You can also use mounting brackets, which provide added stability and allow for easy removal if needed. These brackets can be screwed into place or attached with strong double-sided adhesive tape.
It’s important to consider the placement of the LED light strip before securing it. Ensure that it is positioned where it will provide optimal lighting and achieve the desired effect.
If you plan to hide the strip behind furniture or cabinets, make sure there is enough space for proper ventilation as LED strips generate heat.
Can All LED Light Strips Be Cut?

There are differences between cuttable and non-cuttable LED light strips, and it is important to check the manufacturer’s specifications before attempting to cut them.
Differences between cuttable and non-cuttable strips

Cuttable LED light strips are specifically designed with designated cutting marks, allowing you to easily trim them to the desired length. These marks indicate where you can safely cut without damaging the strip.
On the other hand, non-cuttable LED light strips do not have these designated cutting points and are not intended to be cut. Trying to cut non-cuttable strips may result in damage or malfunction of the strip.
It is important to check the manufacturer’s specifications before attempting to cut an LED light strip, as this will determine whether it is safe and possible to cut. So make sure you choose a cuttable LED light strip if you plan on customizing its length for your specific needs.
Checking the manufacturer’s specifications

Before cutting LED light strips, it is important to check the manufacturer’s specifications. Different LED strip models may have different rules for cutting and reconnecting. Some strips are designed to be cut at specific intervals, while others cannot be cut at all.
Be sure to read the instructions provided by the manufacturer to ensure that you are following the correct guidelines for your particular LED light strip model. This will help prevent any potential damage to the strip and ensure that it continues to work properly after being cut.
Common Mistakes and Tips for Cutting LED Light Strips

Some common mistakes to avoid when cutting LED light strips include cutting through the copper dots, making clean and straight cuts, and testing the strip after cutting. Additionally, it’s important to use sharp scissors or a cutting tool designed for precision cuts to ensure a neat edge.
Avoiding cutting through the copper dots

When cutting LED light strips, it is important to avoid cutting through the copper dots. These copper dots are essential for the proper functioning of the strip and cutting through them can cause damage or even render the strip useless.
To ensure that you don’t cut through the copper dots, it is recommended to use sharp scissors or a cutting tool specifically designed for cutting LED lights. Take your time and make clean, straight cuts along the designated cutting mark on the strip.
By being careful and precise, you can successfully customize your LED light strips without damaging them.
Making clean and straight cuts

To make clean and straight cuts on LED light strips, it is important to use a sharp cutting tool like scissors or a craft knife. Start by measuring the length needed for your specific application.
Then, locate the designated cutting mark on the strip, usually indicated by a line or symbol. Carefully position your cutting tool along this mark and apply even pressure to cut through the strip in one smooth motion.
Avoid bending or tearing the strip while cutting to maintain its functionality.
Testing the strip after cutting

After cutting an LED light strip, it is important to test the strip to ensure that it still works properly. This can be done by connecting the cut end of the strip to a power source and turning it on.
If the lights illuminate as expected, then you have successfully cut and maintained functionality of the LED strip. However, if there are any issues such as flickering or dimness, it may indicate a problem with the connection or damage to the strip.
In such cases, troubleshooting steps like checking for loose connections and making sure the soldering is secure may be necessary. Overall, testing after cutting ensures that your customized LED light strip is functioning correctly before installation.
SO, Can LED lights be cut?

In conclusion, LED lights can indeed be cut to fit different areas and spaces. By following the proper technique and using the right tools, such as scissors or a sharp cutting tool, you can trim LED light strips to your desired length.
Just remember to check for designated cutting marks and follow the manufacturer’s instructions to ensure you don’t damage the strip. Cutting LED lights allows for greater versatility and customization in your home or any other area where you want to install them.
So go ahead and get creative with your LED light strips!
FAQs
1. Can LED lights be cut?
Yes, you can cut LED lights to fit different areas using the proper technique for cutting LED strips.
2. What should I know before trimming LED light strips?
You need to understand the cut marks on LED light strips and have the right tools for cutting LED lights accurately.
3. Is it safe to cut my own LED Lights?
While it is possible, precautions must be taken when cutting LED strip lights to maintain their functionality after cutting.
4. How do I reconnect my cut pieces of Led Light Strips?
The steps for cutting and reconnecting led lights involve carefully attaching them back together so that they remain connectable and controlled.
5. Does Cutting Led Lights affect their flexibility and customization?
No, one of the tips for cutting Led lights includes ensuring that versatility or flexibility isn’t lost with your changes.

As a dedicated mother and passionate software developer, she weaves her diverse experiences into captivating stories that inspire and engage readers. Emma's love for sustainable living and environmental consciousness permeates both her personal and professional life. When she's not immersed in the world of coding and software development, Emma can be found nurturing her family and tending to her thriving organic garden. Her commitment to sustainable practices extends to every aspect of her life, from repurposing household items to embracing eco-friendly technologies.